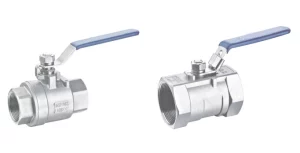
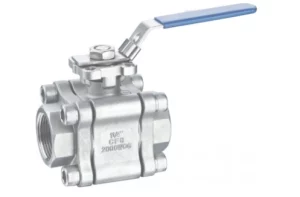
Step-by-Step Guide to Installing a Threaded Ball Valve Efficiently

Preparing for Installation
Tools and Materials Needed
Before starting the installation step, ensure the tools and materials are ready. Opt for a wrench set, pipe compound (or Teflon tape), a pipe cutter if necessary, as well as the new threaded ball valve. Having a bucket or container handy to capture any remaining fluids during the installation is also recommended.
Safety Precautions and Best Practices
Safety is the key when dealing with plumbing systems. Be sure that you’re wearing the right personal protective equipment gloves and safety goggles. You must ensure that the system has been fully depressurized before working on it to prevent any accidents. Be aware of the safety rules that apply in your area of work. Understand the safety protocols that you must comply with in your workspace.
Assessing the Installation Site
While you are ready to go through the installation process, make sure that you carry out a site survey on where the threaded ball valve will be installed. Inspect the piping system for any signs of corrosion or damage that will need to be addressed prior to installing the new valve. Also, have sufficient space around the installation site for the use of tools and connection securing.
Detailed Installation Process
Removing Old Valve Components
Steps to Safely Remove Existing Valves
Start by making sure all sources of pressure are off and that there is no other excess pressure in the system. Gently remove any old valves from the pipeline with a wrench. Be careful not to destroy any adjacent pipes during this step. Just ensure that you don’t hurt other pipes linked with it.
Handling Residual Pressure and Fluids
Have a plan in place to deal with any remaining pressure or fluids that remain in the pipeline. Put a bucket or container under the pipeline to catch any fluids that may escape when you uninstall old valve parts. It will help keep the desk clean from spills. It will prevent messes and also help to keep your workbench clean.
Installing the New Threaded Ball Valve
Aligning the Valve Correctly
When installing a new threaded ball valve , alignment is crucial for optimal functionality. Ensure that the valve’s flow direction matches that of the pipeline system. The handle should be easily accessible for operation once installed.
Securing Connections and Seals
Clean the threads of both ends of the valve and apply some pipe sealant or wrap Teflon tape around it to make sure it fits tight. Using a wrench, fasten the valve into place but be careful to not overtight as this is the leading cause of damage with valves and piping. With the help of a wrench, screw the valve into place, but be careful not to overtighten because doing so may damage both the piping and valve.
Testing the Installed Valve for Leaks
After the installation, it is important to check for leaks before returning this system back to full service. Slowly restore pressure to the system and look around all connections for any leaks. If there are any leaks, then tighten the connection a little or add more sealant depending on the situation. If there are leaks, retighten some connections to re-expansion or add more sealant when needed.
Miwival threaded ball valves offer reliable performance that is highly resistant to leakage, thanks to features like self-adjusting stem seals, anti-static devices, and more. With features including self-adjusting stem seals and anti-static devices, Miwival threaded ball valves are dependable for leakage prevention and maintenance of efficient operation capability over their lifetime.
Troubleshooting Common Issues
Identifying Installation Errors
Misalignment and Connection Problems
Misalignment can be one of the most prevalent challenges encountered when installing a threaded ball valve. This causes ineffective operation and possible leaks. The valve is correctly fitted to the flow direction of the pipeline. Commonly, misalignment is where the valve is out of place causing strain on the joints. This can be avoided by measuring carefully and making sure that all components are firmly tight.
There can be also connectivity issues if you do not seal the threads well enough. When seals aren’t adequate it’s possible for leaks to develop that can reduce system efficiency. To prevent this, make sure that there is a pipe sealant or Teflon tape evenly around the threads before screwing in the valve. With consistent inspection and maintenance, you can determine connection issues beforehand.
Seal and Gasket Failures
Besides, seal and gasket failures are another failure type to influences the service of threaded ball valves. However, seals and gaskets can deteriorate through the use of weather elements. This degradation can lead to leaks or decreased operating efficiency. The degradation causes leakage or a drop in operation efficiency.
Therefore, it is essential to use high-quality materials appropriate for the media transported through the system, to avoid premature fractures of seals and gaskets. Having routine maintenance checks means that seals and gaskets can be checked for any signs of wear or damage before they fail, and replaced as needed. During routine maintenance examinations, seals and gaskets must be examined for any proof of wear or destruction to change them before they work as designed.
Solutions for Common Problems
Correcting these frequent installation mistakes is a mix of good planning, correct installation techniques, and routine maintenance practices. If misalignment is the problem, make sure that it is aligned properly at installation, using hoverboard alignment tools or guides if necessary. With connection issues, verify that all threads should be clean and debris-free before applying the sealant or tape.
Promoting seal and gasket shortcomings can be avoided through application of resilient materials. Establish a regular maintenance schedule that may catch issues early to fix them before they cause serious problems. Having a routine maintenance program in place will catch some potential issues early and corrective steps can be taken before catastrophic failures occur.
Enhancing System Efficiency with Miwival Products
Advantages of Choosing Miwival Valves

The advantages of Miwival valves improve system performance and prolong life. These valves are designed for bubble-tight shutoff meaning that they prevent leakage, even when operated under pressure. They consume less energy when running due to very low operating torque design and thus are suitable for different industrial applications. This low operating torque design results in energy savings during operation making it suitable for industrial applications.
Miwival valves offer self-adjusting stem seals, which minimizes the need for maintenance since they automatically adjust to temperature variations and wear. These valves are expert to prevent static charge and hence act as anti-static devices which is the vital property of these valves especially, where the environment can be volatile. These valves are integrated with anti-static devices, which disallow the formation of static charge making it safe to work in volatile environments.
Exploring Other Miwival Products like 3-Way Plug Valve
Apart from threaded ball valves, Miwival is also a manufacturer specializing in other products that suit various operations and requirements. One of these products is a 3 Way Plug Valve — used to provide versatile flow control options for complex piping systems. Its quarter-turn action feature and heavy-duty build provide added reliability in both standard service and severe service applications.
Different configurations (L-port or T-port) can be used to meet specific application needs in 3-Way Plug Valves. Compact line design enables simple installation with large flow capacity and low-pressure drop. This design provides high flow capacity with a low-pressure drop in a very compact footprint, therefore, easy installation.


